Astrophotography – How to Shoot The Night Sky, Part 1: Preparation & Planning
I’ve been a photography buff for well over fifteen years, an an amateur astronomer since I was 6. Nevertheless, astrophotography – the photography of the night sky, always appeared to be an intimidating task. The sole idea of capturing the moon, planets, constellations, and even a galaxy, just seemed preposterous. I wrongly presumed that astrophotography required fancy equipment, expensive gear, and a bucket-load of skills. This fallacy once was what stood between what I dreamt of creating, and what I was creating. A barrier that could be broken down only by taking a chance and step into the unknown.
A few hundred shots later, astrophotography had grown to become one of my favourite forms of photography, and remains to be to this day. Earthly landscapes beneath scenic starry skies are truly soul filling, and the intense colors of the Orion nebula and the glimmering Pleiades has not once failed to mesmerize and perplex me.
If you are a beginner and keen on taking this chance and step into the unknown, you’re in luck. With a proper DSLR camera, a sturdy tripod, and a large dose of patience, and some planning, the glistening Milky Way is within your reach.
Read on for some tips, tricks and easy applicable step-by-step instructions that are actionable for all type of photographers, no matter skill levels. Wherever I can, I’ll provide pointers, share the settings I shoot with, and provide links to helpful resources. Without further ado, let’s jump straight into the endeavor of Astrophotography!
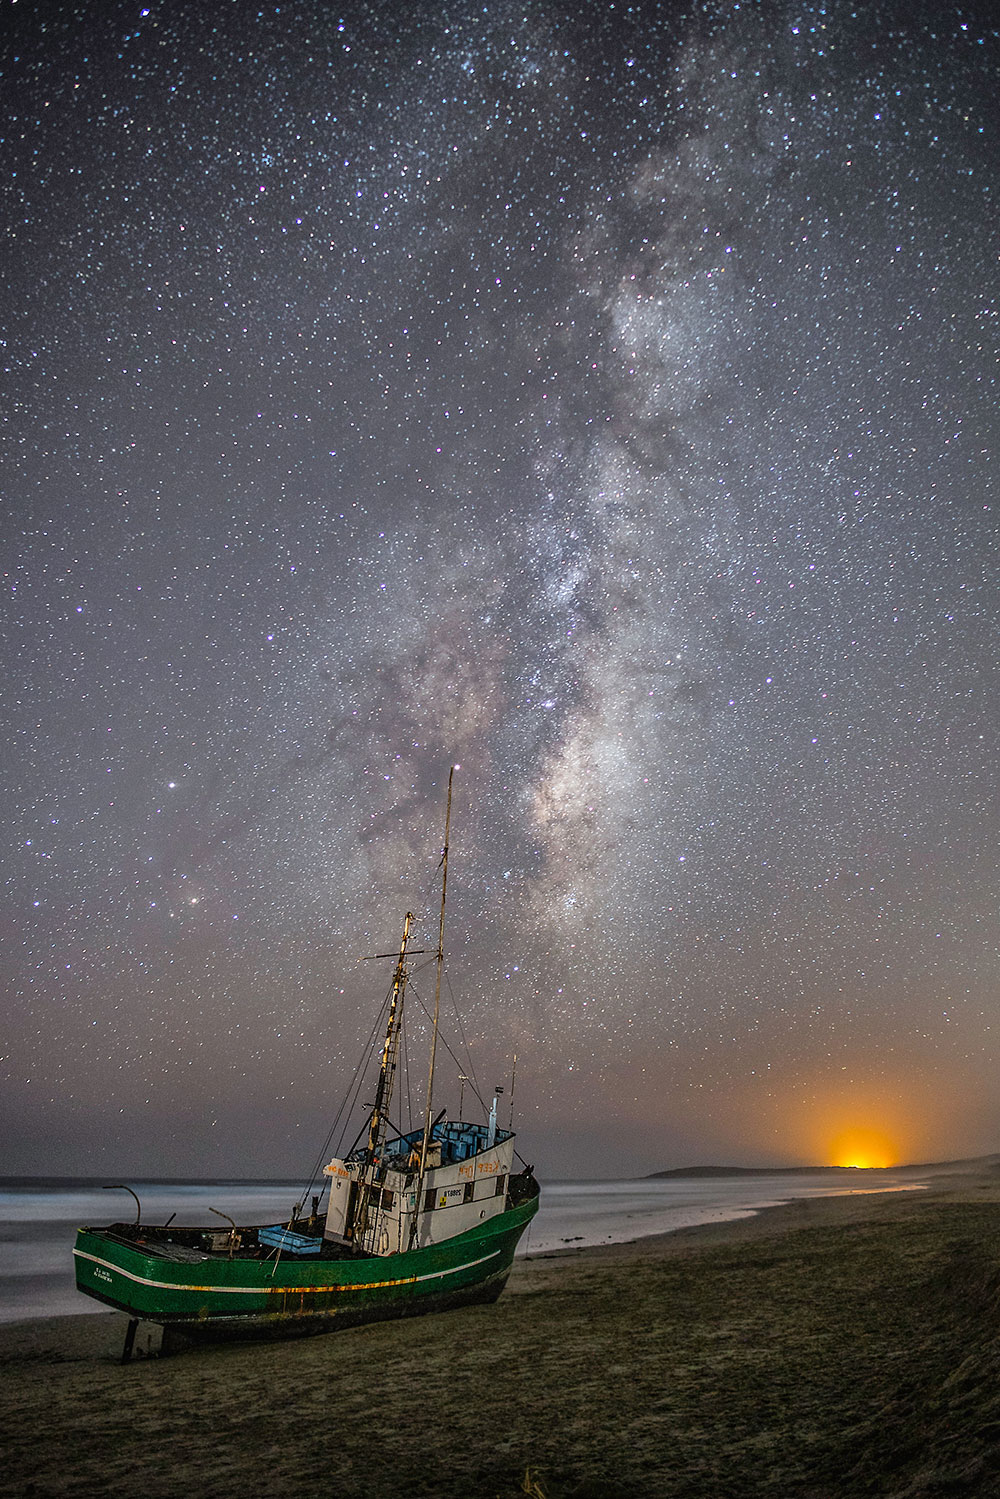
A Grounded Boat at Salmon Creek Beach, USA. Focal Length: 24mm • Aperture: f/2 • Shutter Speed: 20s • ISO: 3200
Different Types of Astrophotgraphy
As with everything else, there are several different types of astrophotography, which vary in level of difficulty, and each type requires different gear and equipment.
Deep Space Astrophotography and Nebulae Astrophotography refers to the type in which photos are taken with the help of a telescope and polar aligned equatorial mount. Subject matter comprise of deep space (beyond our galaxy) celestial objects; such as nebulae, galaxies and clusters. The photograph of the Orion Nebula, pictured below, is an example of Deep Space Astrophotography.
Continuing, Solar System Astrophotography focuses on the planets, moons and the sun of our very own solar system. Images are captured with the help of a long focal length telescope and various accessories, such as teleconverters and Barlow lenses, in order to heighten magnification. The photos are generally very detailed and close-up. Popular subject matter are Saturn, the moon, Jupiter and the sun.
Wide Field Astrophotography (also called Landscape Astrophotography) often involves a wide field of view, incorporating the surrounding landscape, or human subject matter into the images. These type of images are generally shot with a system camera (DSLR or MILC) and a wide-angle lens. This is the branch of astrophotography we will focus on in this article.
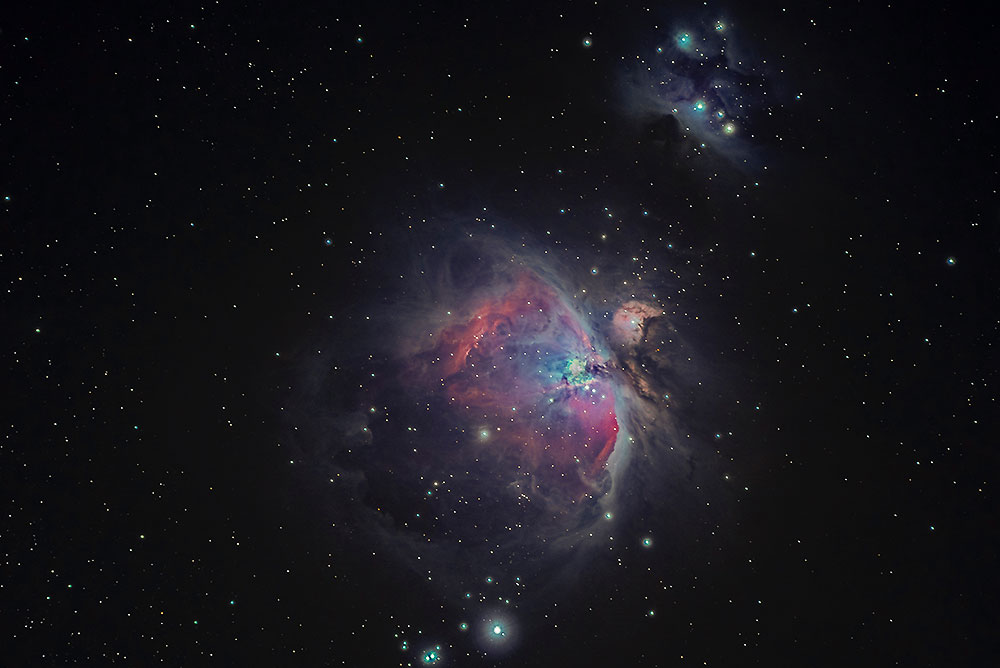
Orion Nebulae. Focal Length: 720mm • Aperture: f/6.3 • Shutter Speed: 60s
Skills Needed
Astrophotography follow the same basic fundamentals of photography – however, with so little light at our disposal, we will be struggling with long shutter speeds and digital noise. You will need to utilize some basic techniques that will help you along the way. To be able to get the most out of these methods, you need to have a fair amount of photography knowledge. If you haven’t, do not fret, and instead familiarize yourself with your camera’s manual mode. You will be working with the ISO, aperture, shutter speed, manual focus and white balance. You will also need to understand how to interpret your camera’s histogram.
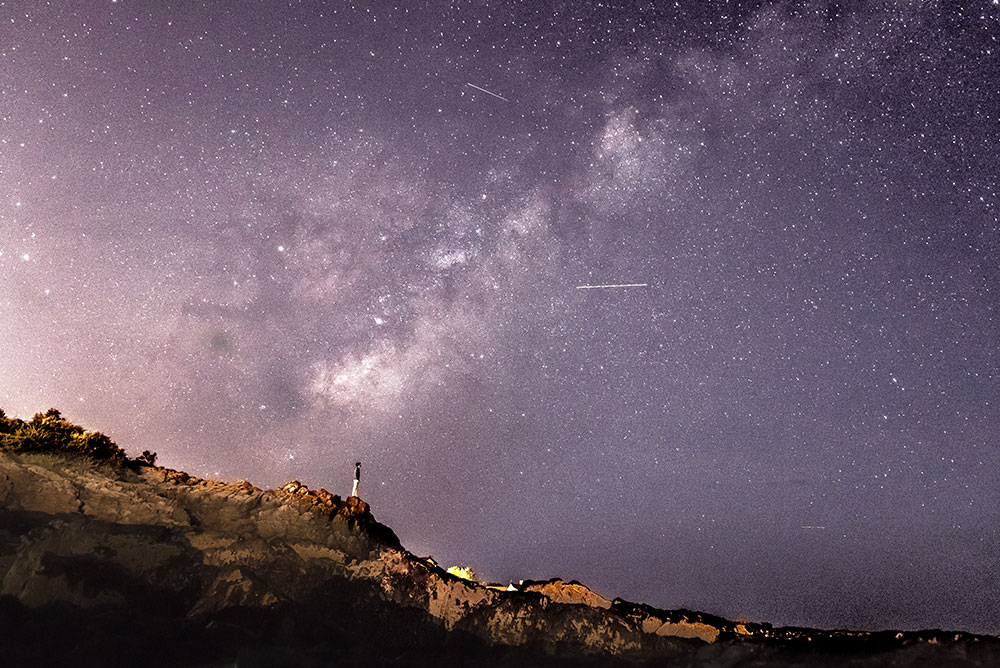
The Milkyway as seen from Maine, USA. Focal Length: 18mm • Aperture: f/1.6 • Shutter Speed: 10s • ISO: 1800
Find A Dark Location
One of the key elements to capture astonishing photos of the night sky is a dark sky. Billions of years ago, the light of the Earth was created solely by the illumination of the sun, moon and stars. Some hundred years ago, anyone could look up at the sky and witness the Milky Way. But now, in this age with bustling cities and urban sprawls, we are constantly surrounded by light pollution. A side effect of industrial civilization, light pollution is excessive and obtrusive artificial, man-made light that brightens the sky. It competes with, and overpowers the light from the astronomical bodies (such as the stars, asteroids, moons and planets) in the night sky, thus impairing our view and interferes with our observation of the universe.
With this in mind, you will need to scout for a truly dark location – a sweet spot away from the ever burning city lights. The darker, the better. The ideal location for astrophotography is generally far away from urban lights, where light pollution is not as substantial. NASA’s Blue Marble map, as well as the Light Pollution Map are two excellent resources that will assist you in your search for dark skies. They provide satellite images of man-made lights on Earth, and overlays them on Google Maps. Use these resources to identify a location where the artificial light does not outshine the stars and the other celestial objects you’re trying to capture.
If you live in the USA, some of the most popular sites for stargazers include the 82 acre Cherry Springs State Park in Pennsylvania (it has been dubbed one of the darkest places east of the Mississippi), the Big Bend National Park in West Texas, The Natural Bridges National Park in Utah, the Death Valley National Park in California, the Big Pine Key in Florida, and Mauna Kea ni Hawaii.
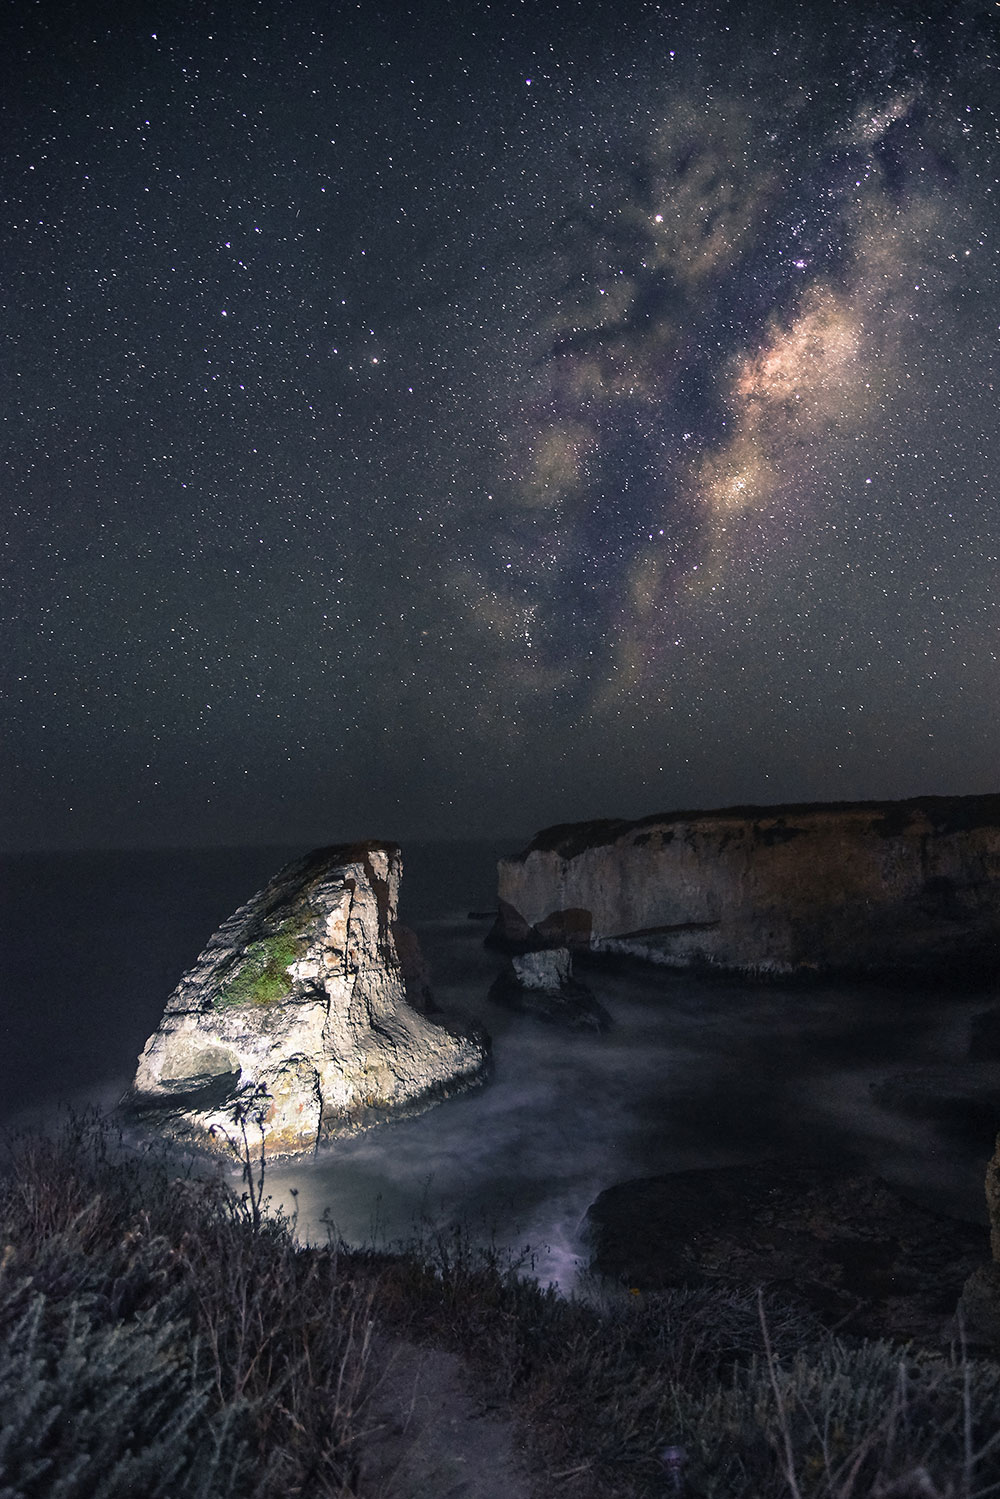
Photo taken at Shark Fin Cove, Davenport, USA. Focal Length: 24mm • Aperture: f/4 • Shutter Speed: 1/20s • ISO 4000
Composition: Plan Your Scene And Incorporate Subject Matters
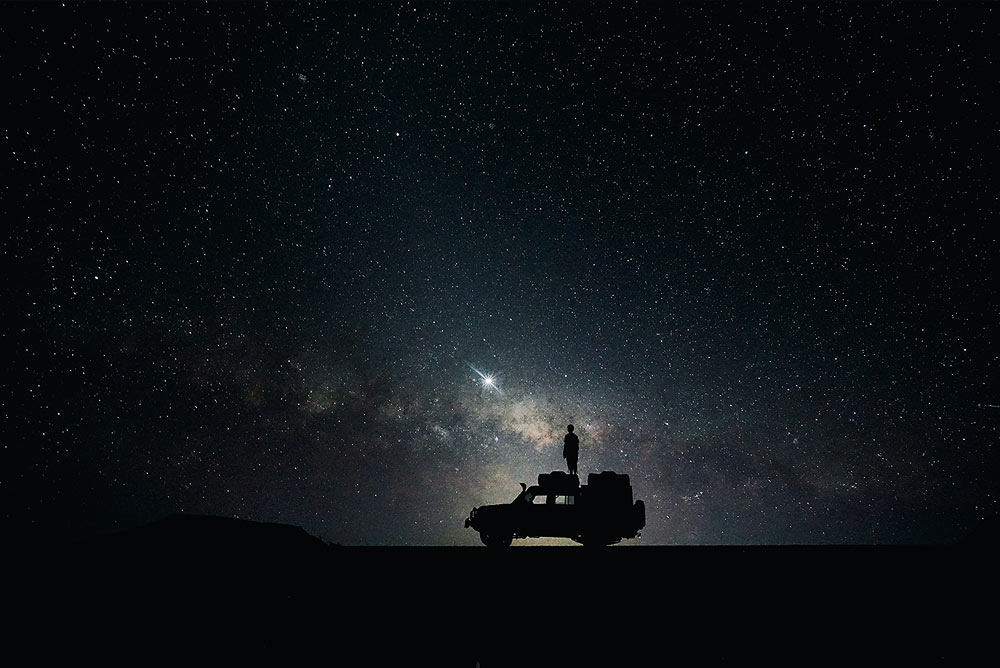
If you want to include your surroundings in the foreground, make sure to plan for the topographical layout of your location. Sometimes, incorporating landscape can make a huge impact. A human element, such as a silhouette in the foreground may nicely complement the starry night sky. A terrestrial object, such as a lake that provides reflections of the stars may enhance the overall photograph. A light house in the horizon may add some depth. Or maybe you simply wish to angle your camera upwards and target only the starry sky and nothing else. The appeal of the final photo is your responsibility, so experiment, play around and have fun.
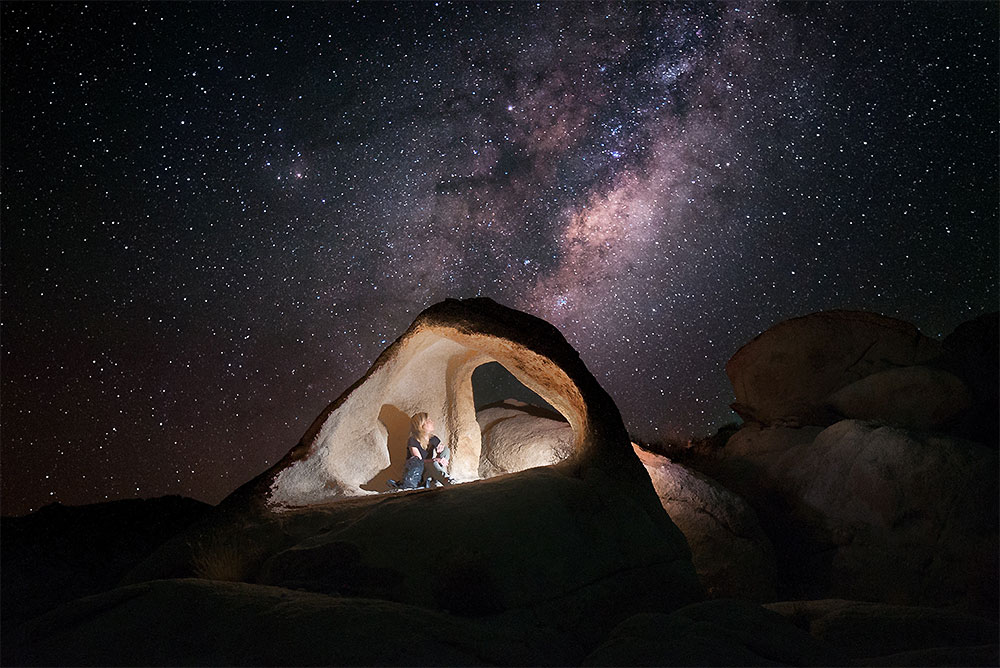
Joshua Tree National Park, USA. The cave makes for an interesting subject matter, set nicely in the foreground, surrounded by the glistening stars.
Focal Length: 30mm • Aperture: f/2.8 • Shutter Speed: 1/10s • ISO 6400
Check Weather and Astronomical Conditions
When scouting for a date for your photo shoot, make sure to check the moon phase as well as the weather forecast. If you are looking to photograph the Milky Way, you ought to avoid shooting when the moon is out. The fainter stars and deep sky objects are unable to compete against large light sources or light sources that are situated much closer to the Earth. The moon works much like light pollution – if the moon is out, the Milky Way and its celestial bodies will be over powered by the light of it, thus not visible in your shot.
Nights with New Moons (when the moon is located between the Earth and the Sun) are ideal, as there is no moonlight reaching the Earth. The week directly after the New Moon will also work, as the moon sets rather early, giving you a few hours of darkness to work with. As for weeks before the New Moon, the moon rises late in the night, so make sure to shoot before it rises.
Furthermore, try to shoot when the sky is at its darkest. This coincides approximately 1-2 hours after the set and before the rise of celestial bodies (i.e. the sun and the moon).
As for the weather, I prefer to shoot when the weather forecasts promises a clear, cloud-free sky. A few skies may add an interesting touch to your photo, but if the sky completely covered by clouds, the stars won’t be visible. I opt for shooting on nights with 0-30% cloud cover.
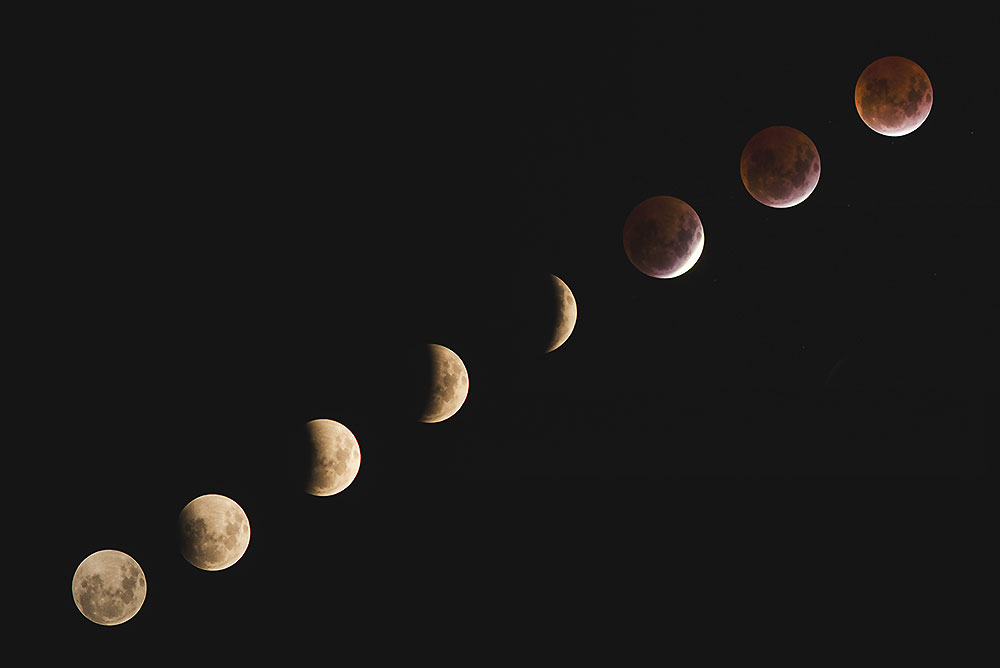
Lunar eclipse.
This concludes the first part in our series on Astrophotography – How to Photograph The Dramatic Night Sky. Continue to Part 2: Camera & Techniques to learn about what gear and equipment to use, as well as an in-depth guide on what settings to adopt.
I hope this article provided an effective learning experience! Apply these principles and open up your eyes to the beauty of space and the galaxy that lies beyond our own. Enjoy your journey under the stars!
18 Comments
-
-
-
Nicole Anderson
Very interesting and informative article. Fantastic photographs. I always look at the sky when I am out camping, but never thought to take a photo, until now!
-
-
Dee Jackson
I just started photography last year. I struggled with dark lighting and this post has alot of useful info.
-
Nordh
I am happy you found the post useful. Photographing in poor lighting conditions can be really tricky, but also very rewarding once you get the hang of it. Good luck!
-
-
Tonya
WHOA! This is incredible! I have always wondered how these types of pictures were captured! How cool! I have love constellations and outer space since I was little!
-
Nordh
I have also had a fascination with the outer space ever since I was little. I truly feel astrophotography is one of the most rewarding forms of photography.
-
-
Rosey
I was just saying I would love to be able to photograph better at night. Admittedly, my skills there are definitely lacking.
-
-
-
-
Ashley
Im brushing up on my photography skills, thanks so much for sharing this post! These are really pretty pictures!
-
-
Lisa Miller-Mecham
What an awesome guide! I took a few photography courses in college but never covered this! Thank you SO much!
-
Nordh
They usually don’t cover it in college courses from what I know, but it’s such a curious niche to explore, can recommend it!
-
-
Miljana
I cannot believe how these pictures are gorgeous!
-
maria
thanks so much for these tips, your photos are insanely beautiful!

Julia Comil
Thanks for these tips! Your pictures are absolutely beautiful! You are mastering it!