How To Photograph Powerful Images of Waterfalls
Waterfalls – one of the most dazzling natural wonders, steals the hearts of travellers and the minds of photographers. Whether it is the Angel Falls, which cascades a thousand metres down the Auyantepui mountain, or the Niagara Falls, foaming furiously between the border of Canada and the US, these falling streams never cease to mesmerize us.
Their hypnotic beauty make them excellent subject matter in images, but nonetheless, the constant motion of the water makes them technically difficult to photograph. This article will guide you through the best tips and techniques to capture truly compelling photographs of waterfalls, creeks and streams.
1
Skills Needed for Waterfall Photography
Just like any other type of photography, shooting waterfalls follows the same basic fundamentals of photography – however, with the water being in constant motion, we need to be able to successfully capture this motion. To be able to do this, you need to have some basic photography skills. If you have not, do not fret, and instead familiarize yourself with your camera’s manual mode, which will give you full control of the exposure. You need to understand the concept of ISO, aperture, shutter speed, and white balance. For the best results, you will also need to be able to interpret your camera’s histogram.

2
Equipment for Waterfall Photography
Make sure you are equipped with a proper interchangeable lens camera, whether it is a DSLR or a mirrorless camera does not matter, as long as it has a full manual mode and as long as you can switch between different type of lenses. Personally, I prefer camera housings that are weather sealed. You will also need a sturdy, quality tripod. The tripod must be sturdy, as photographing waterfalls relies on a long exposure time. Don’t risk ending up with blurry photos because you relied on a light, rickety tripod. These are easily shaken by wind or even a light breeze, and will ruin your entire photo. With any photography that relies on a long exposure time, the quality of your final photograph heavily relies on the stability of whatever your camera is mounted to. A remote control or a shutter release cable will allow you to take photos without touching the camera, and so minimizes shaking the camera during exposure. If you do not have a remote control, set your shutter release on the 2-second timer. You will also need a polarizing filter, which will eliminate reflections on the water and saturate the lush greens in the landscape. Although not crucial, you might appreciate the added benefit of neutral density (ND) filters, which will enable you to work with long exposures without getting an over-exposed scene (excellent for bright conditions). It may be wise to bring a lens cloth to spray off the water off of your lens.
3
Lenses for Waterfall Photography
As for different types of lenses, it really boils down to personal preferences, including what style are you after? Do you want to capture the entire landscape, including the foreground? Or are you opting for close-ups? I love wide-angle lenses in the focal ranges 14-35mm, as they allow me to capture more of the surroundings, as they produce unnaturally zoomed-out images. Wide-angle lenses also have the ability to have an incredible depth of field.
However, wide-angle lenses aren’t always the go-to choice. Standard lenses (35mm-70mm) produce a natural perspective which is very close to what the human eye sees. The lenses with the widest apertures (i.e. f/1.2) tend to be prime (non-zoom) lenses. Generally, prime lenses also have the added benefit of being faster and sharper than any other lens type. If I can’t get close enough to my subject, I prefer prime standard lenses or even telephoto lenses.
Telephoto lenses are amazing for subject matters located far off in the distance, when you can’t get close enough, such as Angel Falls, which plunges off the distant Auyantepui mountain. They are also amazing for producing detailed “zoomed in” shots that focus on a specific part of the waterfall.
Since it can be hard to predict the topographical layout of your location, you would want to carry several different lenses to cover every possible situation – I always do!
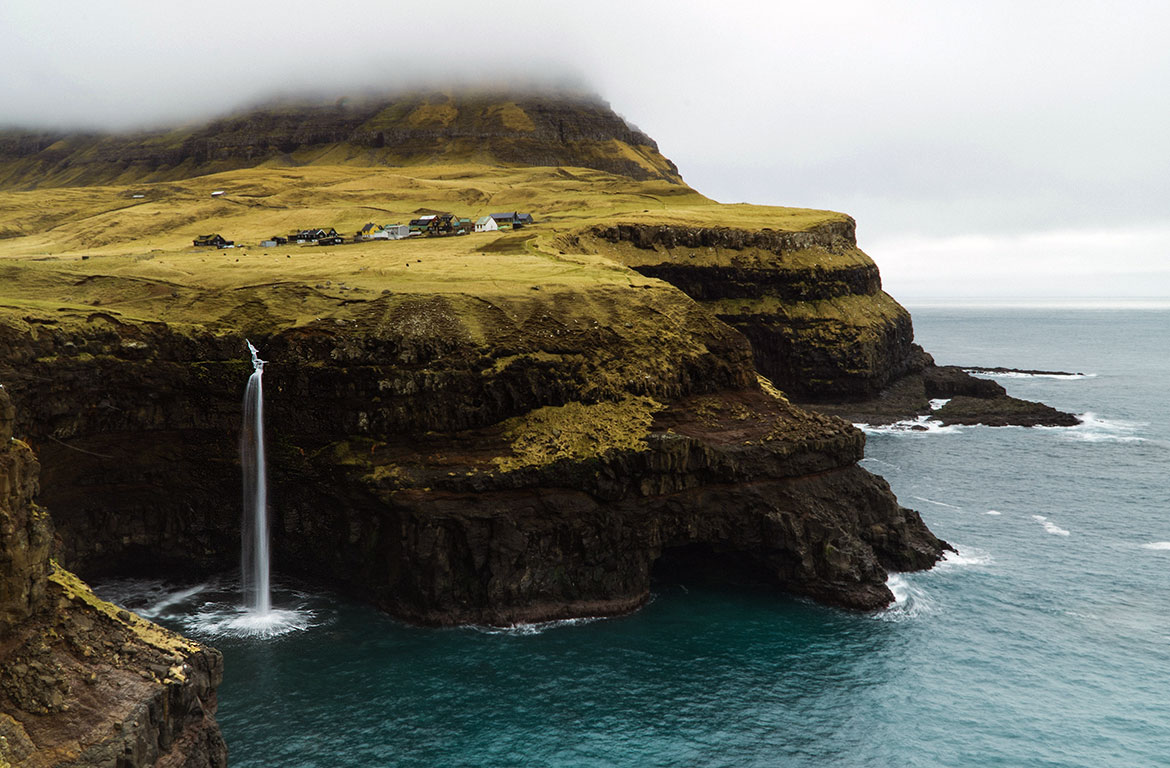
The photo above of the Mulafossur Waterfall in the Faroe Islands is captured with 18mm lens. This enables the sensor to capture much of the scene, hence placing the subject matter in a wider context; tucked between the greener-than-green hue fields and soaring rocky mountains.
4
ISO
Shoot in manual mode. I usually start with the lowest ISO my camera can go, which is 100. I snap a test shot to see if my image is bright enough without displaying too much noise. Most modern full-frame sensors are able to handle higher ISO settings (3200 or even higher). Lower-end models are able to handle 1600, any higher than that and they start to incorporate too much noise. Always try to avoid really high ISOs as it will degrade your photo quality, and opt for the lowest ISO possible as it not only produces less noise, but also lets the sensor capture more dynamic range.
5
Aperture
As for the aperture, it all comes down to what results you are after. A narrow aperture, i.e. a big aperture value (such as f/11, f/13, f/16) will give you a large depth of field. This will allow much of the scene to be in focus, from the foreground right through to the background. Also, as a narrow aperture allows less light to hit the sensor, you will be able to use a longer exposure time.
In contrast, a wide aperture i.e. a low aperture value (such as f/3.5 or f/4.6) will give you a shallow depth of field. This will isolate your subject and make it stand out from its surroundings. A wider aperture allows more light to hit the sensor, so if you’re shooting at dusk or dawn, you might want to use a slightly wider aperture.
I try to avoid using the smallest or largest aperture possible, due to the fact that many lenses lose their sharpness at either end of their aperture scale. At a lens’ maximum aperture, you risk to encounter chromatic aberration and vignetting, and at a lens’ minimum aperture, you risk getting diffraction. Try to find your “optimum” aperture, a sweet spot, at which your lens produces the sharpest images.
- Opt for a narrow aperture if you want to capture an entire scene and ensure everything in your frame is in focus, whether it be trees, boulders, flowers or a person in the foreground.
- Opt for a wide aperture if you want to isolate your subject, or if you find yourself in a low light condition and don’t want to bump up the ISO or adjust the shutter speed.
6
White Balance
This part can be particularly tricky if you are shooting in an area with large amount of very lush, green vegetation, where the light may bounce off the trees and pick up an unpleasant green tint. The auto balance will not be able to present an accurate white balance, so to avoid o avoid awkward colour casts, make sure you use a custom white balance setting. If you shoot in RAW mode (which you should) you always have the opportunity to alter the white balance during the post-processing.
7
Shutter Speed
Photographers are divided on the matter of the optimal shutter speeds for waterfalls. This may sound like a cliche, but truly, there is no such thing as one correct shutter speed for shooting waterfalls. The optimal shutter speed is dependant on what type of effect you are after, as well as the type and flow of the waterfall. Decide which effect is to your liking. Do you wish to freeze the motion of the water, or do you want to capture the motion blur? A fast shutter speed freezes the motion, a slow shutter speed smooths it out. Also, consider the flow of the waterfall. The rate at which the water is plummeting partially dictates what shutter speed you should be using.
8
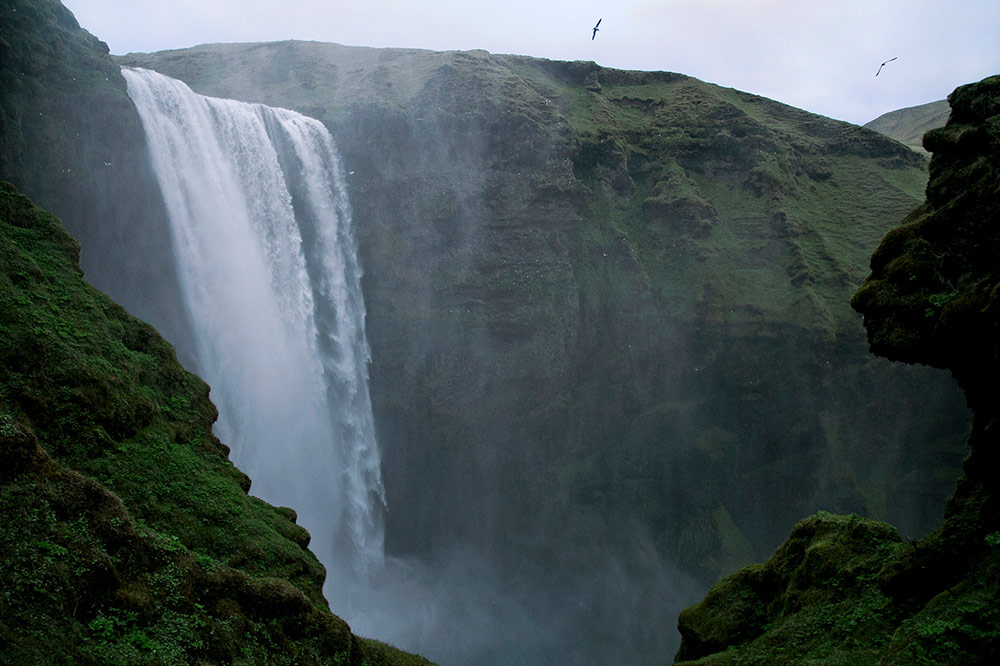
Shutter Speed for Freezing The Water
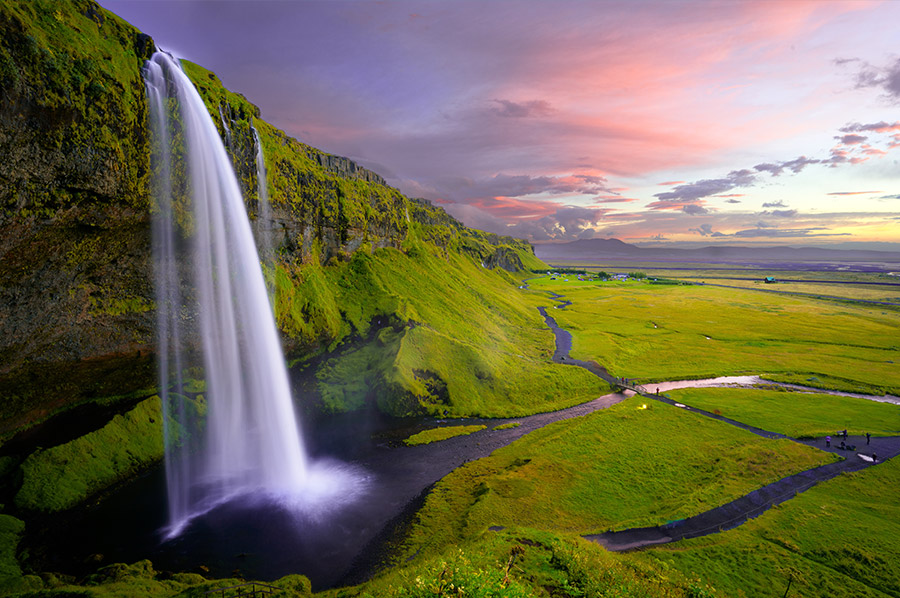
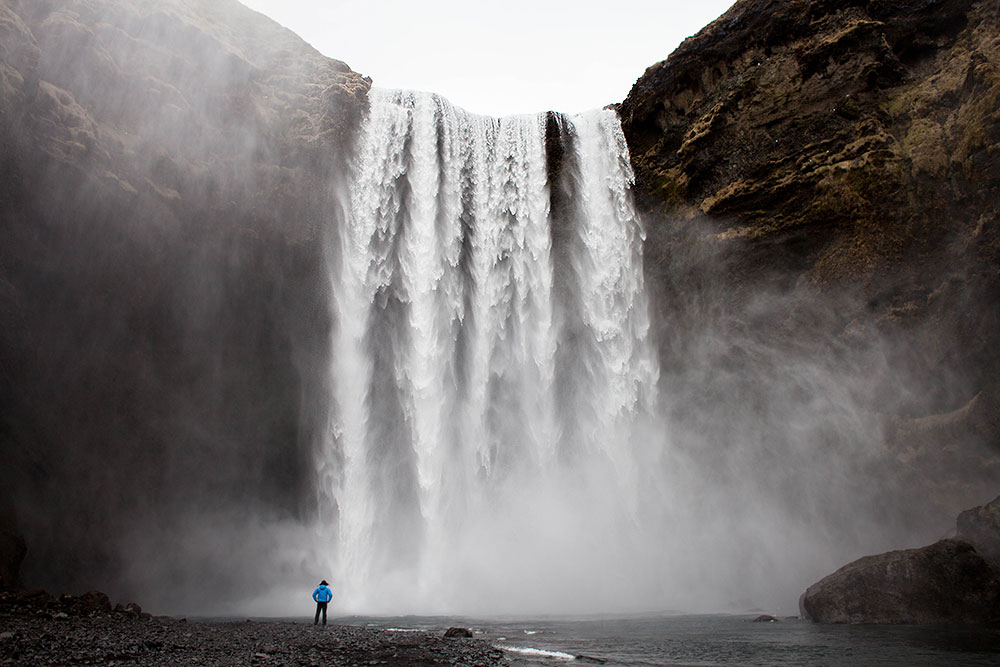
A fast shutter speed will freeze the motion of the water in the waterfall, making the water appear as if it was frozen mid-air, as demonstrated in the image above. This technique can be particularly powerful on large, raging, waterfalls that carry huge volumes of tumultuous water, waterfalls with plenty of explosive splashes. On large waterfalls like the one pictured above, freezing the movement of the water gives a dramatic effect and produces bewildering results. To give you an idea, the image above of Skogafoss in Iceland utilizes a fast shutter speed of 1/4000s to capture a frozen moment of action, successfully conveying the violent nature of the plunging water. As a rule of thumb, shutter speeds from 1/125 second and faster will freeze the movement of the water.
If you shoot with a fast shutter speed:
-
- You may need to remove your filters to allow more light
-
- You may need to use a wider aperture to let in more light
- You won’t need a tripod

9
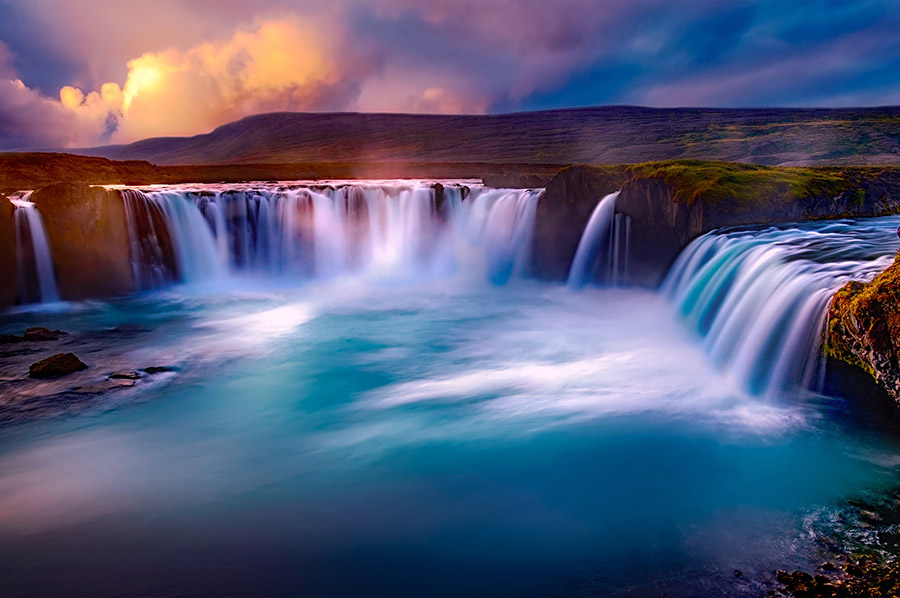
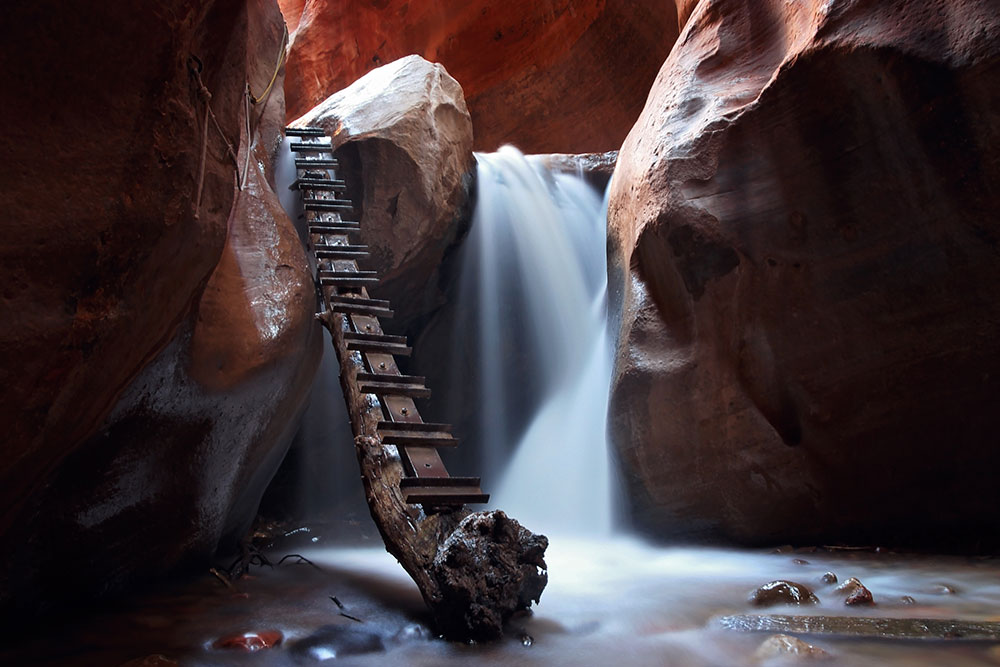
Shutter Speed for Smoothing The Water
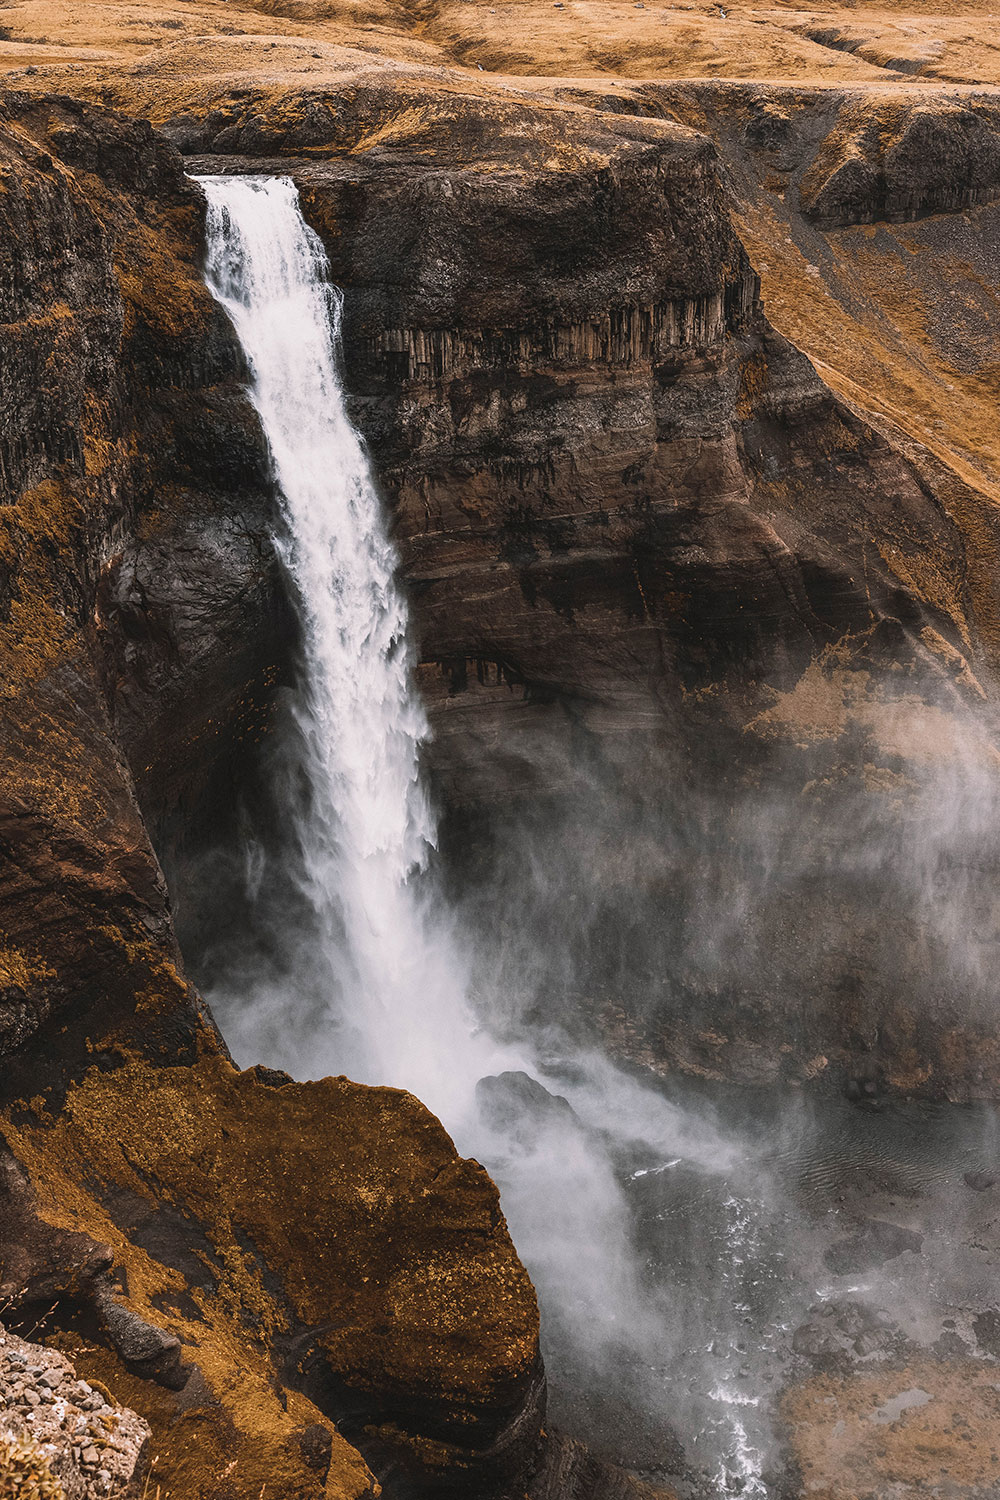
A slow shutter speed will make the water appear smooth as silk, as demonstrated in the image above. The key to capturing the motion blur in the water is to utilize a slow shutter speed. As a rule of thumb, a shutter speed of at least 1/2 second and longer to produce a smooth effect. To give you an idea, the image above is also of Skogafoss in Iceland, but this time, photographed with a slow shutter speed of 30 seconds. The slower shutter speed allows us to show the movement of the water, instead of freezing it.
If you shoot with a slow shutter speed:
-
- You may need filters to minimize the light that enters the lens
-
- You may need to use a narrower aperture to minimize the light that enters the lens
- You will need a tripod
10
Filters
During bright conditions, you might need to add your filters. A neutral density filter reduces the amount of light that hits the sensor, without affecting the colours of the scene, thus enabling you to utilize a slower shutter speed without getting an overexposed scene. An alternative to the neutral density filter is a polarizing filter. A polarizing filter also reduces the amount of light that enters the lens, and in addition, reduces the reflections from the water, wet rocks, and leaves. It also increases colour saturation and results in an overall more vivid image.
11
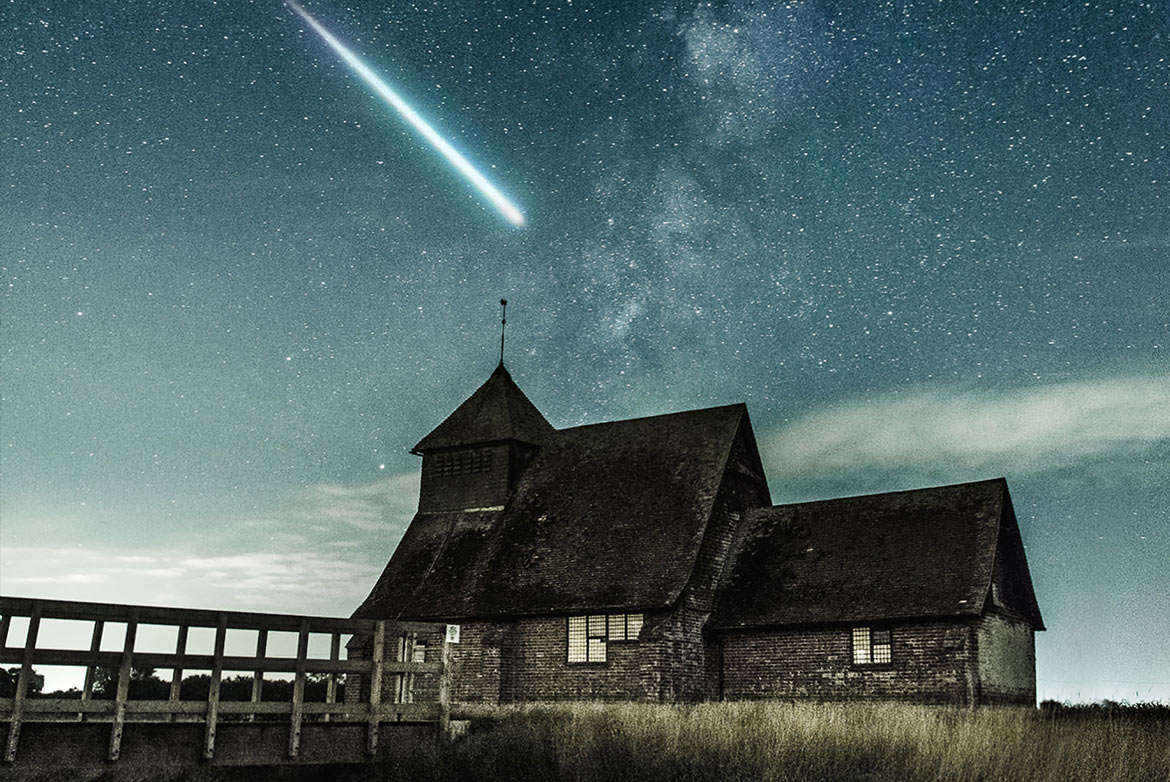
Composition
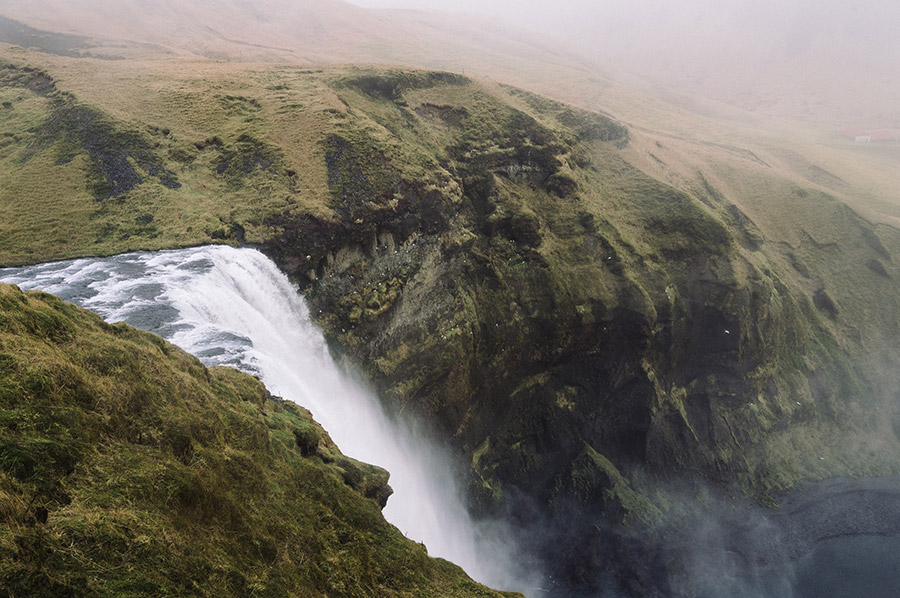
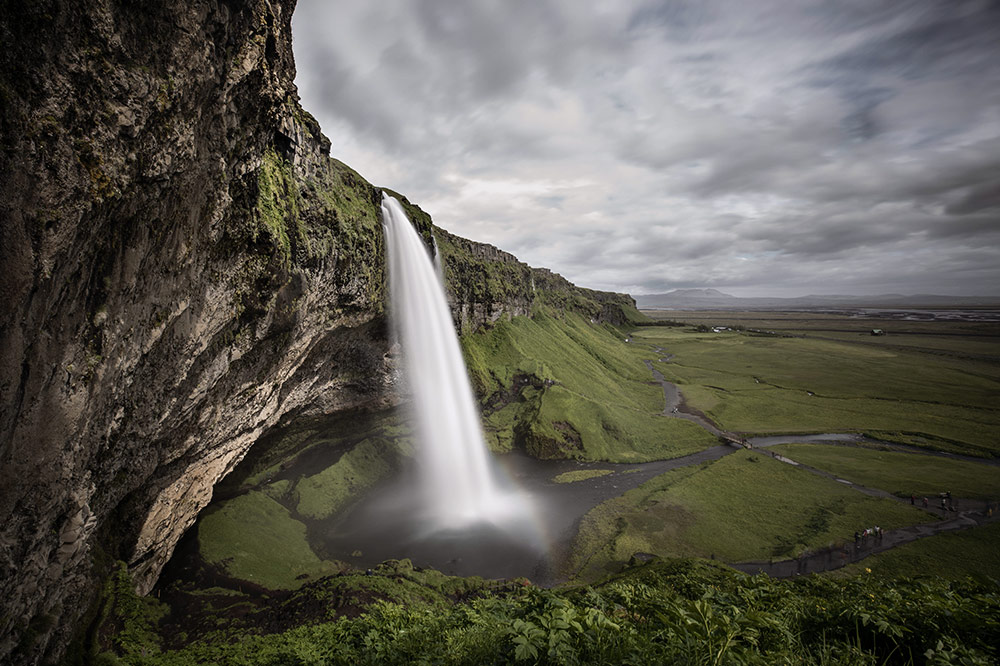
If you want to include your surroundings in the frame, make sure to plan for the topographical layout of your location. Sometimes, incorporating the environment surrounding the waterfall can make a huge impact. Including the boulders, cliffs and vegetation may enhance the overall photograph. A bird in the horizon may add some depth. The appeal of the final photo is your responsibility, so experiment and figure out what works for you.

12
Incorporate The Human Element To Provide A Sense of Scale
By definition, landscape photography should be purely natural. Sometimes, however, incorporating a human element, such as a person in the foreground, may nicely complement the towering mountain vista and the waterfall cascading down the rocky cliffs. Adding a person in the scene provides a sense of scale, brings a whole new sense of wonder to your photo, and it may also make the viewer feel a connection to the wilderness.
Key Tips for Shooting Waterfalls
| Gear | Interchangeable lens camera, tripod, remote control OR shutter release cable, wide angle lens, neutral density filters, polarizing filter, lens cloth. |
| Shutter Speed | From 1/125 second and faster if you intend to freeze the motion |
| Shutter Speed | At least 1/2 second, in darker conditions up to 20 seconds, if you intend to capturing the motion. |
| Tip | A too slow shutter speed may result in blown out highlights. |
11 Comments
-
-
Nordh
I really hope you will enjoy your time in Iceland. It’s a stunning country and I’m sure you will have a blast! Definitely worth brushing up on some photography skills before the trip to Iceland as that country offers some amazing photo locations!
-
-
Adele Gee
This is so useful as I try to improve on my photography skills. Great tips picked up from your article about apertures, shutter speeds as well as using a remote control to reduce the shake. I am saving this for when I will use it in the near future! Great stuff!
-
-
Joella
These are all great tips. I still need to learn to use the manual mode of my camera better. I love how the slow shutter makes the water look. I also definitely need to get a good polarizing lens I find the reflections annoying and think this will be a great benefit. By the way I found it interesting you mentioned Angel Falls as I grew up in Venezuela and therefore visited this waterfall and the entire area quite often. It is by far one of the most beautiful places in the world. To bad the situation there is not good to visit. Anyway thanks for the tips will look into the filters and get practicing those settings on manual.
-
Nordh
I would definitely recommend reading up on how to use the manual mode, as it gives you so much more flexibility and control over your images. It also allows you to be a lot more creative. I don’t believe you necessarily must shoot manual ALL the time, but it definitely will make you understand depth, light, exposure, and focus in a completely new way. I love the Angel Falls and agree that it is one of the most beautiful places in the world! It’s a shame the situation isn’t the best at the moment, I am hoping for improvements soon!
-
-
Amar Singh
I must admit this is an extremely helpful post for a novice photographer like myself and if only I read this post before I visited Iceland. It was a struggle to capture the beauty of the waterfall without having the knowledge of how to capture the motion. Great to know it’s better to get to the manual mode which I was not aware of. The photos on the post look stunning and I would love to be able to capture it like this. It’s adds great depth to the post I am visiting Croatia in the next few days and will use some of the tips. Thanks.
-
Nordh
I’m happy to hear you found it helpful. Iceland is an amazing place to travel to in regards to travel photography – there is so much to shoot! Good luck on your trip to Croatia!
-
-
Corritta
The picture are beyond amazing, they are so good they look unreal. I am definitely going to save this because I need to take better pictures. Instagram and Snapchat makes everyone seem like they are photographers but this takes true talent. This is a converstion that we are constantly discussing. Some photos that we seem doesnt even look real. How much experience do you have?
-
Leo
Learn a lot today, and I am pinning this for my reference! Would you say that one can shoot quality waterfall photos with a cropped sensor, or would I need to invest in a full frame camera instead? Thanks for the informative article, I really appreciate you sharing your knowledge!
-
Edward
Could you please share your techniques on how to maintain the scale of the waterfall? I’m disappointed in the photos I took as the waterfalls look minuscule and I feel that the shot doesn’t do it justice. I understand that your previous article recommended to include a human element so to show scale, but I usually shot on my own and don’t have a model. Would a polarizing filter work the same as an ND filter for this type of photography? Thanks for sharing, patiently waiting for your next photography article! I would love one on travel photography or action photography.


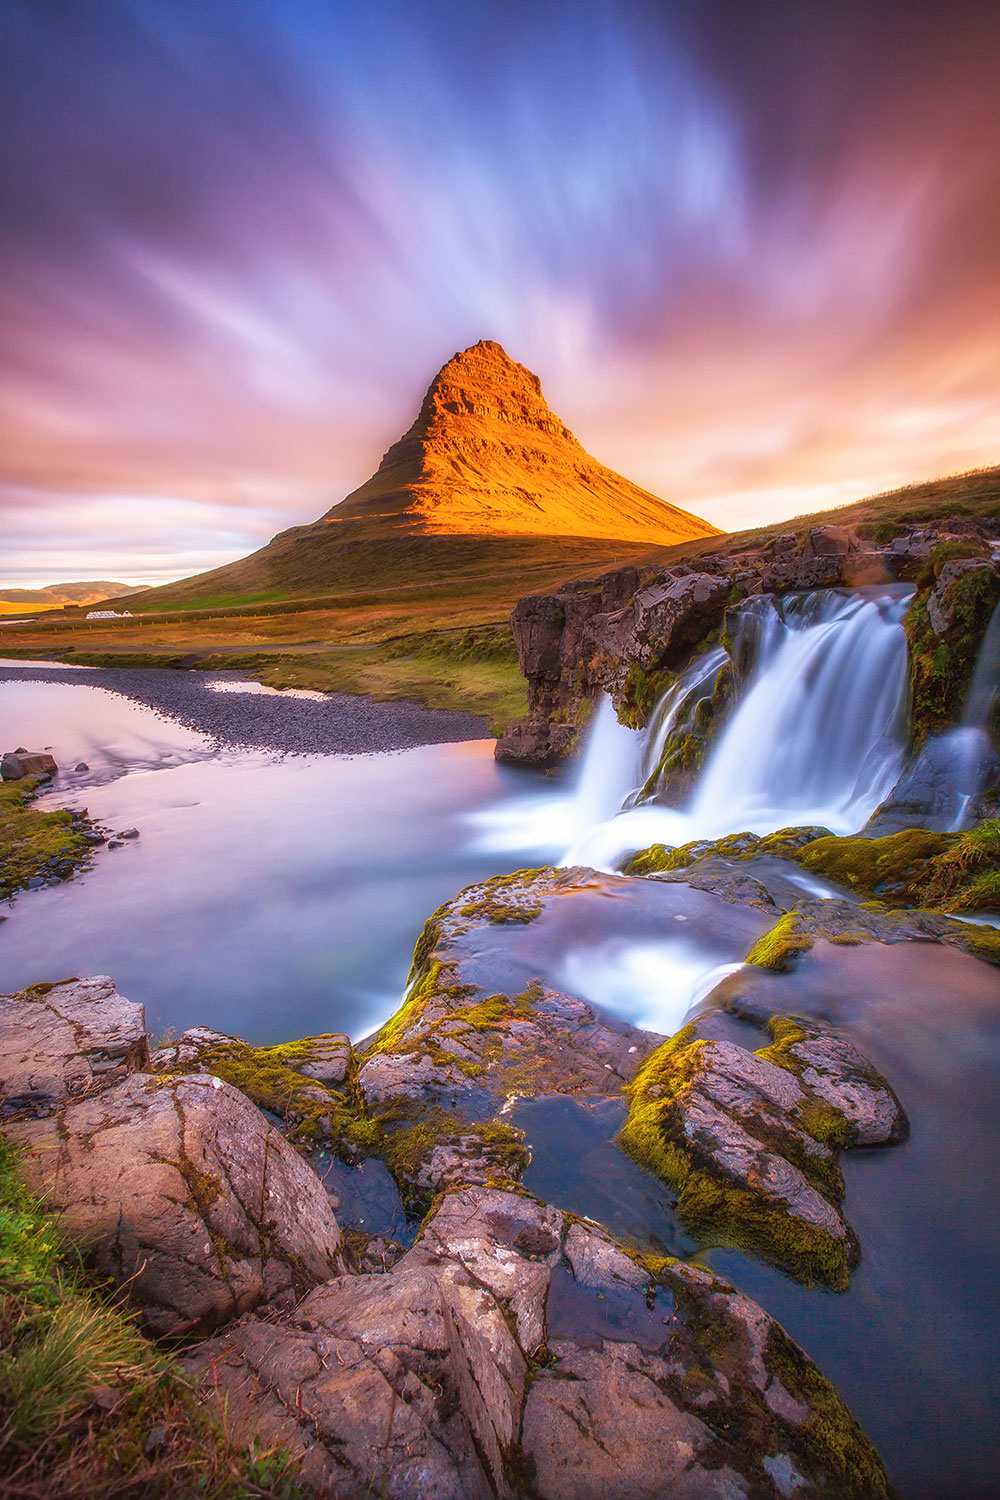
Medha Verma
You have amazing pictures I have to say! Actually this is the perfect time for me to be reading your post because I am visiting Iceland next month and I will be at Kirkjufell and the moment I saw your picture of the place, I was so in awe that I realised, I need to know how to get such beautiful pics. I usually use the auto mode in my SLR or iPhone for my pictures but I’d like to take some lessons and tips such as yours to make sure I get breathtaking photographs of such a gorgeous place.